네트워크 환경설정 - FW (CentOS7)
1.
인터페이스 이름 변경
vi .etc/default/grub
GRUB_CMDLINE_LINUX 항목 뒤 quiet 뒤에 net.ifnames=0 문자열 추가
grub2-mkconfig -o /boot/grub2/grub.cfg
reboot
2.
IP 주소 부여
cd /etc/sysconfig/network-scripts/
viifcfg-eth0
DEVICE=eth0
NAME=eth0
ONBOOT=yes
IPADDR=192.168.0.X = 윈도우에 부여된 ip +1
NETMASK=255.255.255.0
GATEWAY=192.168.0.1
DNS1=8.8.8.8
ifdown eth0, ifup eth0
cp ifcfg-eth0 ifcfg-eth1
vi /ifcfg-eth0
DEVICE=eth1
NAME=eth1
ONBOOT=yes
IPADDR=192.168.100.100
NETMASK=255.255.255.0
ifdown eth1, ifup eth1
cp ifcfg-eth1 ifcfg-eth2
DEVICE=eth2
NAME=eth2
ONBOOT=yes
IPADDR=192.168.200.100
NETMASK=255.255.255.0
ifdown eth2, ifup eth2
yum install net-tools : ifconfig 포함 네트워크 도구
네트워크 환경설정 (8.8.8.8 ping 활성화)
3.
초기화
•
IP forward 설정
◦
echo 1 > /proc/sys/net/ipv4/ip_forward
•
NAT 설정
◦
iptables -t nat -A POSTROUTING -s 192.168.100.0/24 -o eth0 -j MASQUERADE
•
firewalld(동적방화벽) 서비스중지
◦
systemctl stop firewalled
◦
systemctl disable firewalled
4.
초기화 스크립트 작성
vi init_accept.sh
#!/bin/sh
systemctl stop firewalld.service
echo 1 > /proc/sys/net/ipv4/ip_forward (방화벽만 설정)
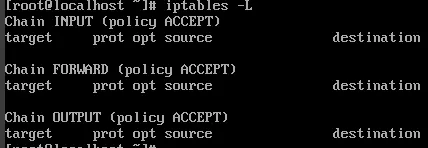
iptables -F
iptables -t nat -F
iptables -P INPUT ACCEPT
iptables -P OUTPUT ACCEPT
iptables -P FORWARD ACCEPT
iptables -t nat -A POSTROUTING -s 192.168.100.0/24 -o eth0 -j MASQUERADE
systemctl start sshd
echo “Done”
Shell
복사
chmod 755 init.sh
./init_accept.sh
cp init_accept.sh init_drop.sh (
#!/bin/sh
systemctl stop firewalld.service
echo 1 > /proc/sys/net/ipv4/ip_forward
iptables -F
iptables -t nat -F
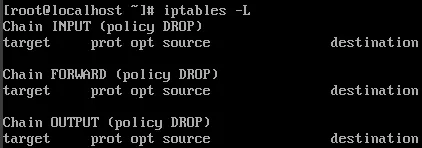
iptables -P INPUT DROP
iptables -P OUTPUT DROP
iptables -P FORWARD DROP
iptables -t nat -A POSTROUTING -s 192.168.100.0/24 -o eth0 -j MASQUERADE
systemctl start sshd
echo “Done”
Shell
복사
./init_drop.sh
5.
vi /etc/selinux/config
selinux=disabled
Shell
복사
reboot


